Logging in using File-transfer apps
csf3.itservices.manchester.ac.uk
GUI Tools
We recommend using the free MobaXterm application for file-transfers to/from the CSF and also for your day-to-day command-line access to it. Hence this tool provides everything you need to use the CSF! You may also want to use the free WinSCP tool which is an easy-to-use file-transfer app.
MobaXterm File Transfers
For help with downloading, installing and logging in to the CSF using MobaXterm please see our logging in guide.
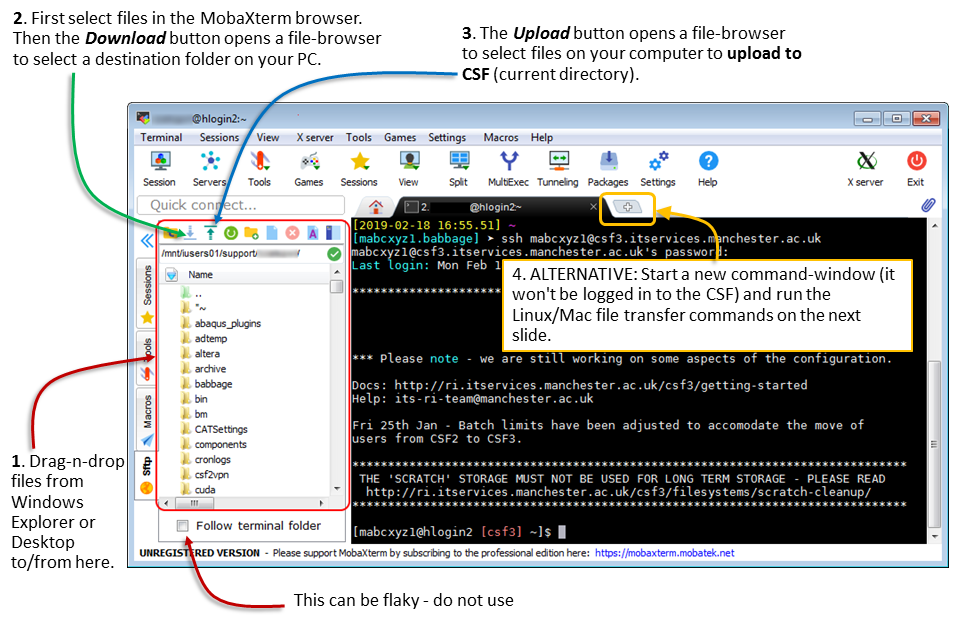
Once you have logged in your can drag-n-drop files to your CSF home-directory using the file-browser in the MobaXterm window. By default it will show the contents of your CSF home directory. Alternatively you can use the upload and download buttons. See the image below.
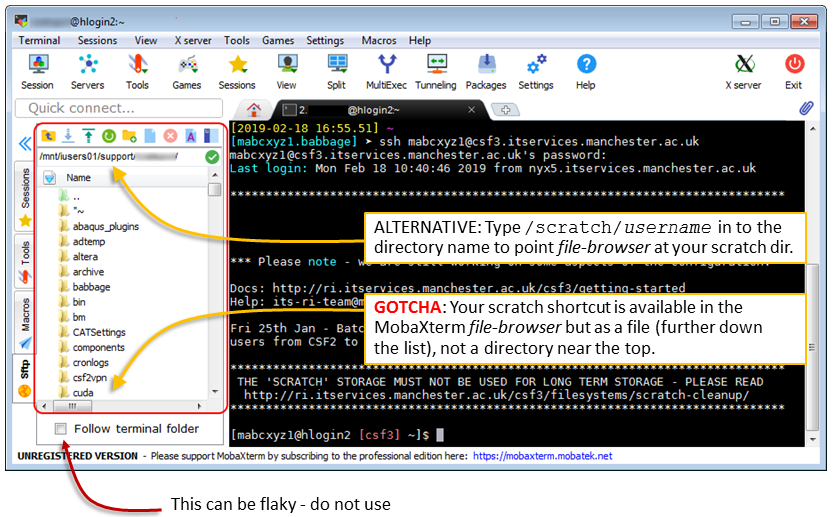
Accessing your Scratch area in MobaXterm
The MobaXterm file-browser will show a list of sub-directories (folders) in your CSF home area. You might expect your scratch folder to appear here. However, MobaXterm displays this using a file icon further down the list (the list is sorted alphabetically). Hence the scratch area is accessible by scrolling down the list and clicking on the scratch file icon.
Alternatively, type the full path to your scratch area in to the file-browser location, using:
/scratch/username
where username is your CSF username.
The image below shows these two methods of accessing your scratch area.
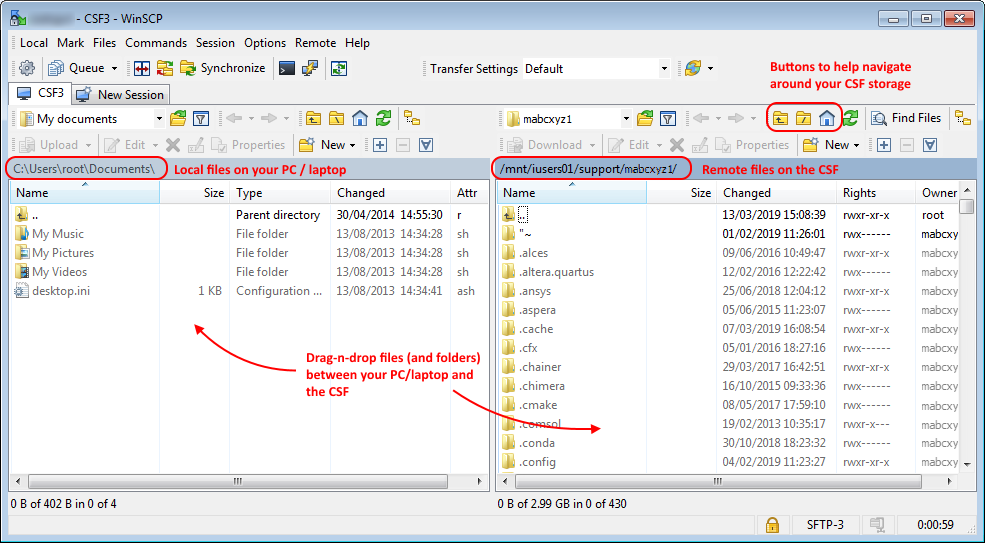
WinSCP
The free WinSCP tool allows files to be transferred to and from the CSF using a drag-n-drop interface. It may already be installed if using a campus cluster PC. You can also download and install for free on your own computer. The instructions below assume you have an installed version on the PC you are using.
We’ll set up a CSF session in WinSCP so that you only need to type the settings in once:
- Start the WinSCP program from the Start menu.
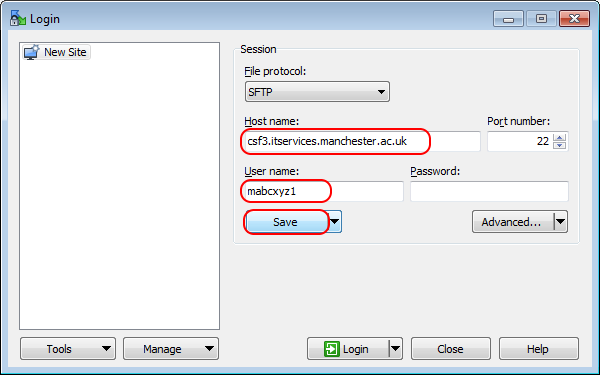
- You only need to do steps 2 & 3 the first time you start WinSCP on this PC. If you’ve already done the following step, jump to Step 4. Otherwise fill in the details as shown below:
- Host name: csf3.itservices.manchester.ac.uk
- User name: your University IT username
- Password: your University IT password
Then hit Save
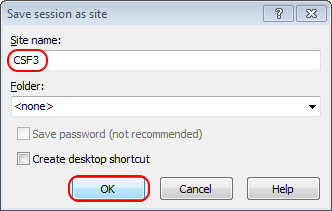
- To save the above settings, give the session a name (any name will do, here we use
CSF3) and hit OK
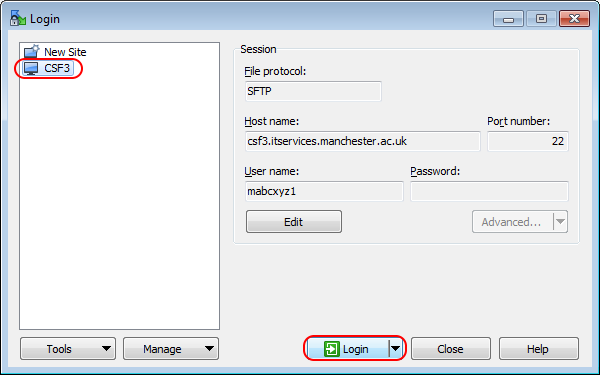
- Now we can log in to the CSF in WinSCP. We’ll do this step every time we wish to transfer files to the CSF. Highlight the CSF session and hit Login.
- Enter your password when asked.

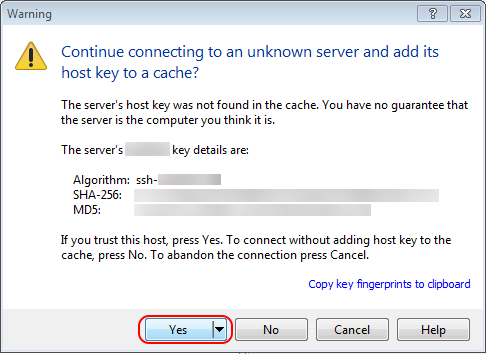
- When first logging in you may be asked to accept a new host key. It is safe to do so:
-
On-campus
If on-campus you will need to authenticate using your 2FA device.
WinSCP will present a dialogue box similar to the image below:
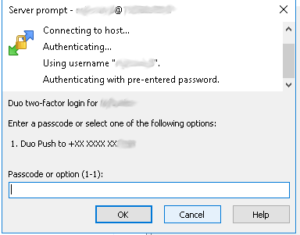
If you use the Duo mobile app as your 2FA device, Enter ‘1’ at the prompt and press Enter. Once the push notification has been received via the Duo mobile app ‘Approve’ the request in order to log on.If you use a Duo fob as your 2FA device, generate a passcode with the fob, type the passcode at the prompt and press Enter
- You can now drag-n-drop files between the two systems. Your local PC is on the left, the CSF on the right (click on image to enlarge).