
Accessing Data in the DSH
To access any project data that has been uploaded into the DSH, you will need to use the Secure Desktop Access service. This service requires you to use the University’s 2-factor authentication service (Duo) to verify your identity before you can gain access to any files in the DSH.
If you are accessing for the first time you will be required to download the Remote Desktop Session icon onto your computer desktop. You will not be required to complete this activity when the icon has been added onto your computer desktop.
- Connect to GlobalProtect. If you experience issues, be sure to use the latest GP client.
- Go to https://desktop.dsh.manchester.ac.uk.
- Enter your usual University login details into the login screen. You may need to use
DS\username
- From the UoM DSH Secure Desktop screen
- The ‘Save As’ screen will appear. Select desktop from the option under the heading Favourites and click Save
- The Remote Desktop Connection icon will appear on your desktop and can be used to access the DSH.
You do not need to repeat steps 1-6 to connect in the future. - Double click the Remote Desktop Connection icon and click connect
- The Windows Security will appear. Enter your University password in the password box.
- The DSH connection will now be established. Please note this may take a few seconds to initialize.
- Once the connection has been established, you will be prompted to complete to complete Two-Factor Authentication (2FA). Follow the instructions on the screen and on your device you registered with the 2FA service.
- When you have successfully logged into your Secure Desktop session, open the Windows Explorer file manager to access your DSH data. The data you have access to will be found in two locations:
- To access data that you have uploaded into the DSH platform (see Using the Secure Transfer Service), select the Home (H:) drive and then click the Secure Transfer folder to access your DSH files.
- To access data that has been shared with you, select the Project Data (I:) drive. The project files you have access to will be listed.
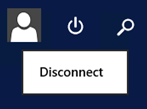
- Jobs may be started which run unattended for 5 days. Start the job, then select “Disconnect” from the power button options.
***PLEASE NOTE*** If you do not have access to the project files that you think you should have access to, contact your PI to review the access permissions